PiperCode: Color Coded
Introduction
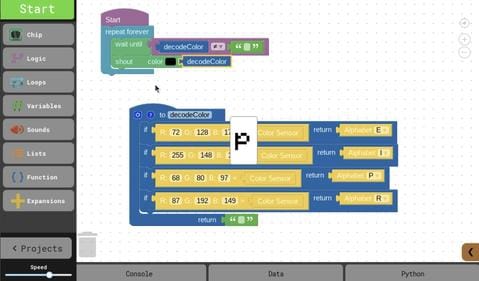
In this project, students will create a "secret message" using the color sensor. The color sensor reads out RGB values in the data section of PiperCode, which the students will enter into the code they write for creating their message.
Concepts
Students use sequences and simple loops to make a program spell out letters in the display when the RGB values are entered into the code. Color Coded is a great step for learning how to create programs that include sequences, events, loops, and conditionals.
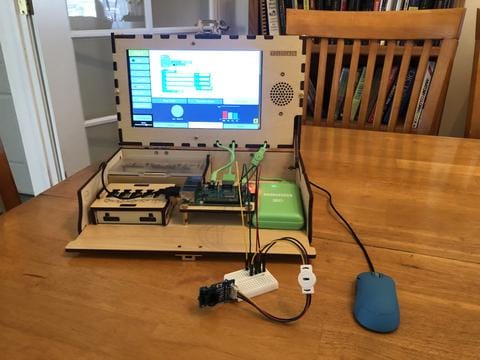
Electronic Parts
1 Piper Computer Kit, 1 Color Sensor, (from Sensor Explorer), 1 Mini Breadboard, 4 Jumper Cables (1 green, 1 yellow, 1 red, 1 black), 1 4-Pin Diode Jumper Cable
Other Materials
Different colored markers and white paper
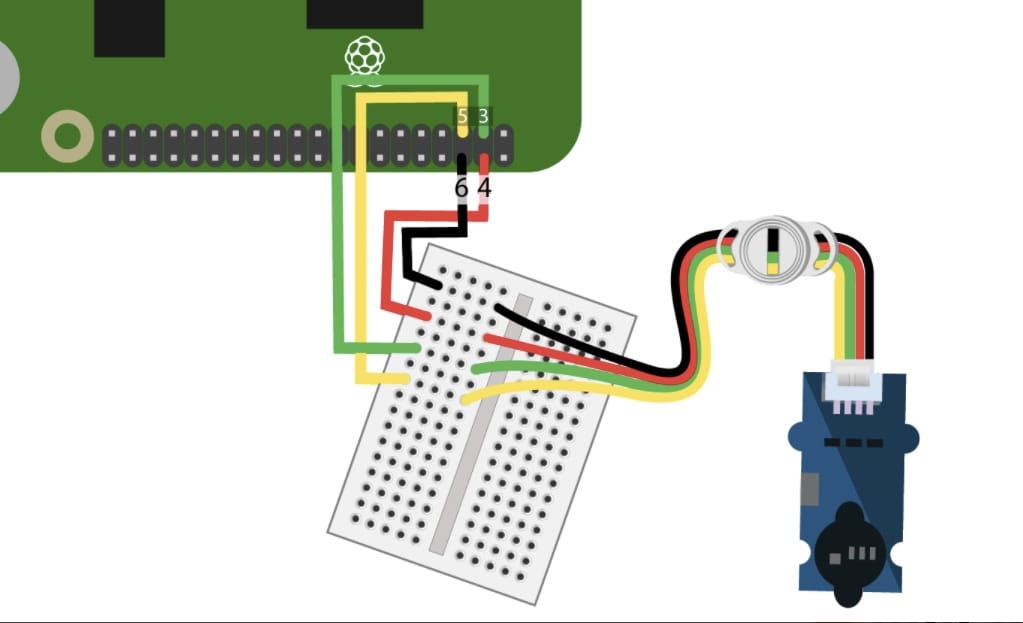
GPIO Setup
5, 6, 3, 4
Troubleshooting Tips
Be sure to hold the color sensor as steadily as possible and wait for the RGB values to stabilize.
It is better to enter in the RGB values in the final step, when you are ready to decode the colors as it is extremely difficult to get the numbers exactly the same for the code to work if they are entered earlier in the process.